
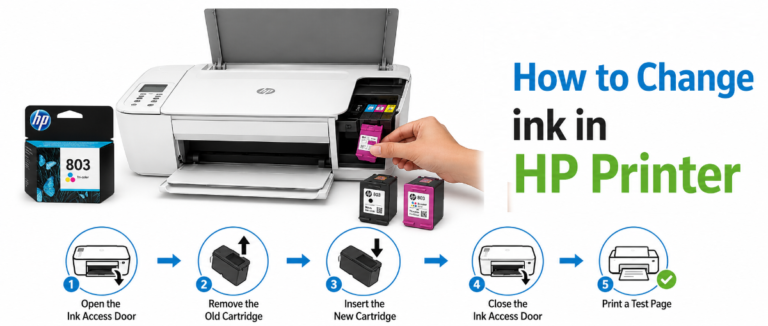
If your printer is not producing essential print output and you’re waving the white flag after multiple attempts, it’s high time to replace the ink cartridges and focus on how to change ink in the HP printer.
checking the status of ink cartridges regularly and replacing them at regular intervals is very important. It helps in various ways, such as maintaining print quality, preventing interruptions during printing, extending the printer’s lifespan, ensuring color accuracy, minimizing waste, and more.
Low ink levels can easily create a queue of issues; therefore, it is essential to address them promptly for better results. To know the right time to do so, you must understand the low-ink level indicators to handle the situation properly. This includes low-cartridge notifications, ink-level warning signs, and all.
If you are a loyal HP printer user and do not want to face such issues, we will help you learn how to change ink in HP printer with the right, precise information. Along with this, the guide will also cover other crucial aspects, including troubleshooting steps for resolving cartridge issues, essential things to know before replacing ink, and more. Stay tuned to know further.
How to Change ink in HP Printer: Things to Consider at First
To replace the ink cartridges in an HP printer, keep the following points in mind. This will ensure the smooth flow of the procedure. Go through all of them at once.
Correct Replacement Of Ink Cartridges
- Use the exact ink model that your printer requires. To find the number, check the front of the machine or the label on the recently installed cartridges.
- If you have enrolled your printer in the HP Instant Ink, then use special cartridges only, which are provided by the subscription. If not, just purchase the standard or high-yield cartridges compatible with your printer line.
Check The Power Source
- When you replace the ink cartridges, make sure the HP printer is turned on and properly plugged into the source. It is essential that the printer requires the internal cartridge to be automatically slide to the center position. Do not perform this process manually.
Essential Materials For Cleaning
- Keep some white paper with you. After installing the new ink, the printer will print an alignment page, which you will require for scanning or processing.
- Have a dry microfiber cloth to wipe off the copper contacts with the printer cradle if it is hard to recognize the new ink.
Software
- If your printer has a screen, you will get guidance through the process. If you don’t have one, you can use the HP Smart app on your phone or computer. This will guide you through the printhead cleaning steps if there is an error with the printer.
Prepare A Neat Space
- Working with ink is a messy process. Lay down paper towels or a cloth on the desk before unpacking the cartridges. This will ensure a tidy, proper procedure for handling the ink.
Troubleshooting Guide For Replacing Ink Cartridges
Here are some of the right steps for replacing ink cartridges mentioned below. Go through all of them at once.
- Keep your printer turned on.
- Lift the scanner of the printer until you get access to the ink cartridges. Now, wait till the cartridges reach the center, and stop making noise.
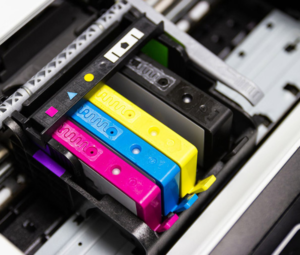
- Now put a little pressure on the front of the old cartridge in order to unclip it, then pull it a little towards you and slide it out of the slot.
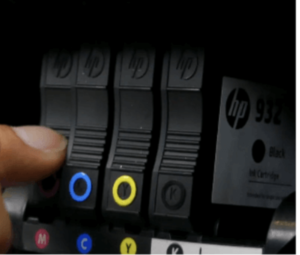
- Now, carefully remove the packing of the new cartridge.
(don’t touch the copper-colored electrical parts)
- Hold the cartridges from their sides in such a way that the nozzles face the printer. Now put it into the color-coded slot at an upward angle, then apply a little pressure and back it up until it settles into its place.
- At last, close the access door of the cartridge. If done, you can also print or scan an alignment page to properly align the printer head for better printing.
Things To Avoid While Removing Ink Cartridges
Here are some of the mistakes that you must avoid as they will directly affect the performance of ink cartridges
- Don’t unplug the printer in the middle of the print job or while replacing ink. Just use the physical power button and wait for it to fully settle down.
- Don’t touch the copper chips or printhead nozzles with your bare hand.
- Avoid using heavily refilled or third-party ink. It will damage your HP printer.
- Don’t install a new cartridge next to an empty cartridge. the printer will directly detect the imbalance and produce an incompatible cartridge error.
- Don’t remove an empty ink cartridge if the replacement isn’t ready yet. This will leave the printheads dry.
- Do remove the plastic tape covering the nozzles before installation.
Conclusion
Removing ink cartridges is simple until you follow the wrong procedure. If you are in search of this, this guide is the best to follow. From troubleshooting steps for replacing ink cartridges to things you should avoid while doing so, we have covered everything to support the proper functioning of the HP printer and ensure you get the expected output.
Related Post:
FAQs
A. Yes, you can replace only an empty cartridge. Do make sure that the new cartridge is compatible with your printer model.
A. Yes, you can do so, but generally it is not recommended. It can lead to print quality issues or cartridge recognition errors.
A. It totally depends on your usage frequency. Heavy use requires replacement every few weeks, whereas occasional use requires replacement every few months.
A. It is generally not recommended to leave an empty cartridge for a long period; it can cause the print head to dry out and affect printing performance.